Configuring A Server
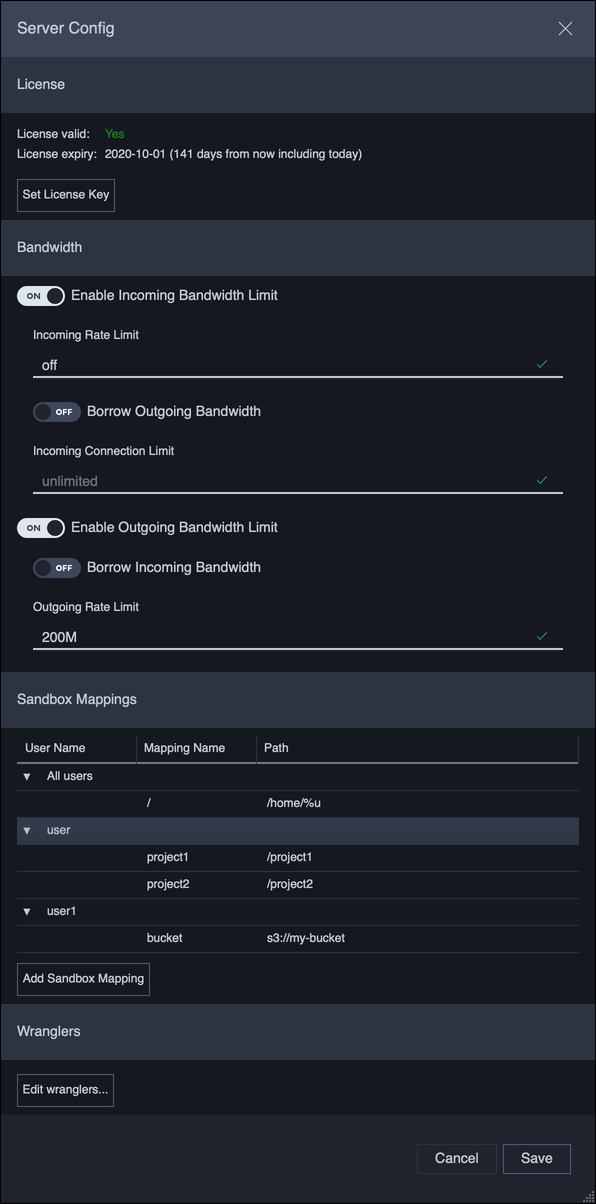
Administrators (users with superuser privileges) can configure the JetStream server referred to by a Location. To bring up the Server Configration dialog:
- Select from the menu.
- In the Location Manager, double-click anywhere along the row of the location you would like to edit.
- Press the Configure server… button.

Clicking Save will immediately commit the settings to the JetStream server.
License
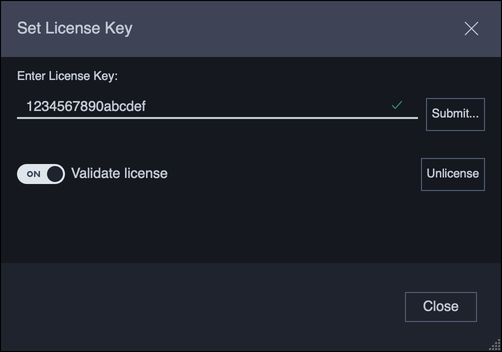
Indicates if the server is licensed. Only licensed servers can send or receive file transfers. The license key can be set or changed by clicking on the Set License Key button.

Clicking Submit… will immediately set the license.
If the Validate license option is on, then the server will check that the license is valid before committing it to the server. If the license is not valid, then no changes are made on Submit.
Clicking Unlicense will immediately remove the license from the server.
Bandwidth
JetStream servers can be set up with incoming and outgoing bandwidth limits, to control the total bandwidth the server can consume.
In addition to setting an incoming or outgoing limit, a policy can be set up to borrow (or share) unused bandwidth between the two limits. Enabling borrowing would allow for maximum utilization of the bandwidth allocated to the JetStream server.
For example, a server is allocated 500Mbit/s total, of which 200Mbit/s is used for incoming bandwidth, and 300Mbit/s for outgoing bandwidth limits. By enabling incoming bandwidth borrowing, outgoing transfers will be able to consume the full 500Mbit/s when there are no incoming transfers. If a new incoming transfer arrives, the incoming bandwidth would be automatically reallocated to the incoming transfer.
Sandbox Mappings
JetStream servers can restrict a user’s activity to a specific location in the file system, or sandbox. Sandboxes can be used to isolate users, or limit them to only specific resources.
There are 2 levels of sandboxing:
- All users: the sandbox mapping applies to every user unless that user has its own mapping.
- Specific user: the sandbox mapping only applies to this user.
A user can have any number of sandboxes so long as these sandboxes have unique names. A sandbox without a name shows up as the root drive /.
A sandbox mapping can be added by clicking the Add Sandbox Mapping button.
There are 5 types of sandbox:
File Path: Restricts a user to a specific folder accessible to the server.Net Share: Windows only When sandboxing to an SMB share on Windows (e.g.\\machine\share) where the user does not have credentials to that SMB share, use this type of sandbox to specify the SMB credentials. If the user’s regular credentials are adequate, then use aFile Pathmapping instead.S3 Bucket: Restricts a user to a specific folder in an AWS S3 bucket. This type of sandbox requires S3 credentials.Backblaze: Restricts a user to a specific folder in a Backblaze b2 bucket. This type of sandbox requires b2 credentials.Wasabi: Restricts a user to a specific folder in a Wasabi bucket. This type of sandbox requires credentials.
Wranglers
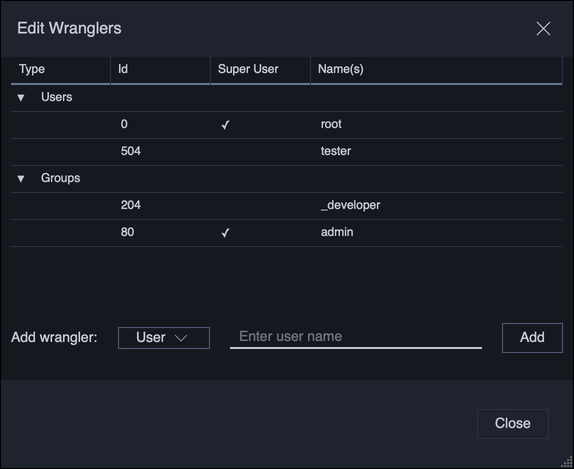
Wranglers are users who can view, cancel, and delete transfers from other users. The list of wrangler users can be edited by clicking the Edit wranglers button.

Wranglers can be added either by user name, or by group name. If a group is added, then all users belonging to that group will be wranglers. Changes to wranglers are applied immediately.
All administrators (users with superuser privileges) are automatically wranglers and cannot have this privilege removed.