Location Editor

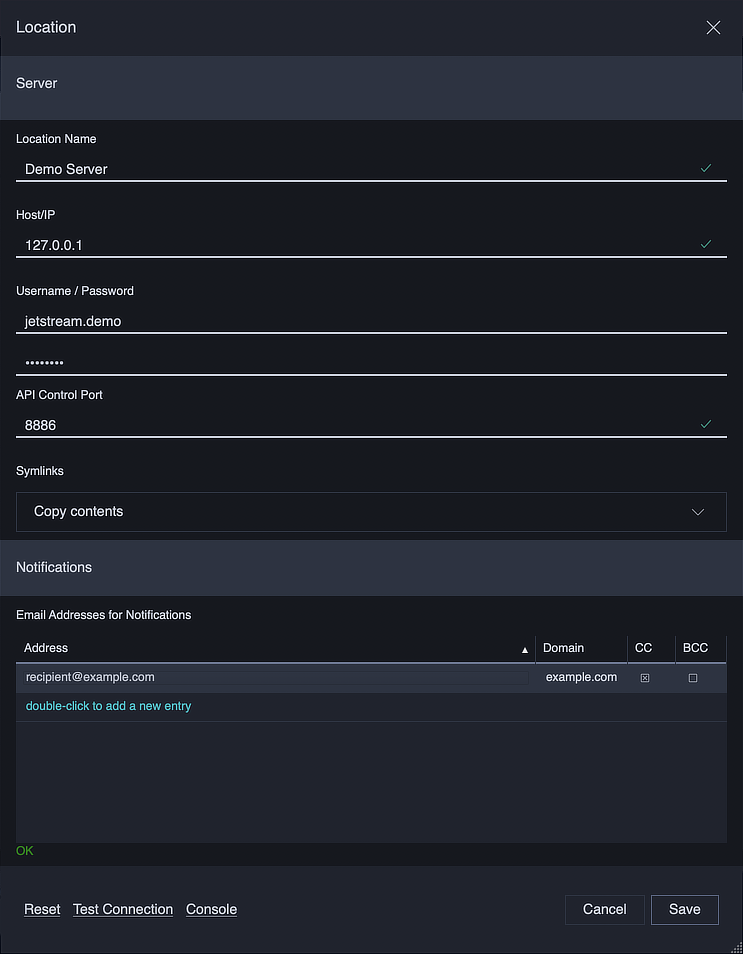
The Location Editor is displayed when creating a new Location and when editing an existing Location.
Configuring A Location
Location Name
Specify a name for your Location. The name can be anything you choose, save for a few restrictions:
- You may not use the name “Local”.
- The name may not be empty.
- The name may not start with whitespace.
- The name may not end with whitespace.
Host / IP
Specify the host name or IP address for the Location’s JetStream server.
Note
JetStream currently only supports IPv4.
You may create more than one Location that connects to the same JetStream server. There are a few reasons why you may want to do this:
- Each Location may require different authentication. The authentication will govern which files and folders are accessible from the client.
- Each Location may specify different email recipients.
Username / Password
If the Location requires a login, specify the username and password here.
API Control Port
Specify the API control port for the JetStream server. This is the port on which the server listens for connections from the JetStream client.
Note
You’ll need to obtain the API control port from the server administrator. By default, JetStream servers use port 8886.
Symbolic Links
The Symbolic Links dropdown provides a default transfer-level option for symbolic link handling. Available options are:
- Copy contents – follow the symbolic link, and copy the actual file contents
- Ignore – Ignore (do not copy) any symbolic links
Notifications
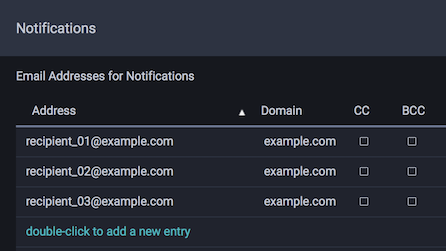
The Notifications section allows you add a list of email addresses for recipients that will be notified whenever a transfer has finished. When a transfer is completed successfully, an email is sent to each recipient informing them that the copied files are available. If a transfer fails, an email is sent to each recipient advising them of this fact.
Tip
For notifications to be available the SMTP email server must be configured from the Application Settings.
Note
Email notifications are sent for recipients configured on the destination side of a transfer. The Transfer Details will show the recipients that will be notified.
Editing An Email Address
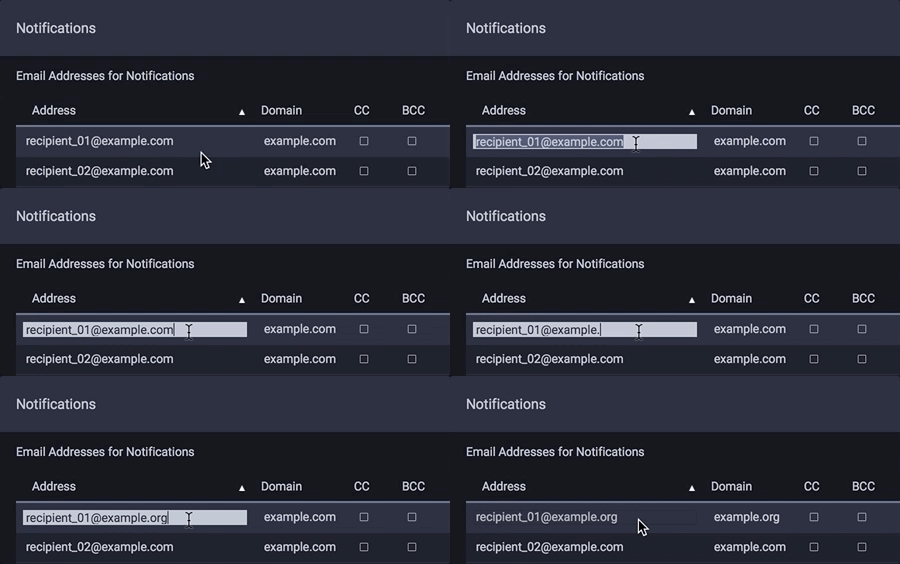
To edit an existing email address, double-click its Address column. The address will become editable.
While editing, a message will appear to explain when an email address is incomplete or invalid. An incomplete or invalid address may not be saved.
Removing An Email Address
To remove an email address from the Notifications list, click once on an address and press the DELETE keyboard shortcut. The address will be removed.
Domain
The Domain column is not editable. It is provided for display purposes, and as a convenience when sorting the table. When sorted by Domain, email addresses targeting the same domain will be grouped together.
CC / BCC
Each email address shows optional CC and BCC checkboxes. If CC is checked, the address will be added to the notification email’s CC list, and excluded from its TO list. If BCC is checked, the address will be added to the notification email’s BCC list, and excluded from its TO list. If neither CC nor BCC are checked, the address will be added to the notification email’s TO list.
For each address, the CC and BCC options are mutually exclusive; you can not enable both at the same time. Multiple addresses can be set as CC or as BCC.
Testing Your Connection
Once you have configured your location, click on Test Connection to check if your connection setup works. This will bring up the Connection Test dialog, which runs a variety of tests to determine if the server you have configured is accessible and can be used to transfer files.
Connection Console
JetStream provides a command line console for sending JetStream API commands to the server at any given location. This can be useful in certain troubleshooting scenarios. To bring up the connection console, click on Console.

